The majority of people in the world always have some sort of camera about them. We now possess more images than ever before, whether they are from a high-end digital SLR or your smartphone camera. But what if you get the picture just right? Only to find out later that it’s not quite as good as you thought?
It’s time to open your go-to photo editor and restore the charm to that picture, of course! As they are not all created equal, picking the best photo editor for Windows isn’t always as simple as it first appears. Fortunately for you, we are here to help you separate the good from the poor.
With its user-friendly design and integrated tips, and tutorials. And instructions, the most recent edition of Photoshop Elements is a great choice for beginning photographers. Without being overrun by a plethora of features you don’t need. You’ll have access to a small number of the greatest editing tools on the market. Elements’ Expert mode, provides a few extra tools and features to let you really express your creativity. Can be selected once you feel more at ease with your editing.
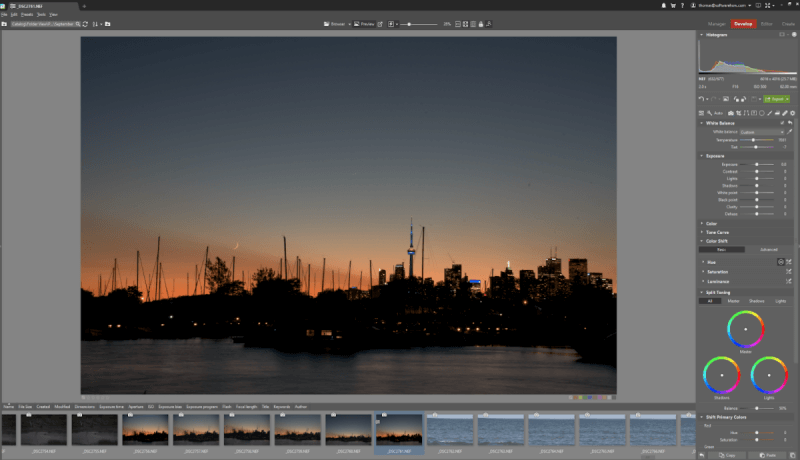
Zoner Photo Studio X may be just what you need if you’re seeking something with a little more editing capabilities. It’s the most advanced photo editor you’ve never heard of, offering powerful editing capabilities at an amazingly low cost. With cloud storage integration and regular feature upgrades featuring intriguing new capabilities. It’s currently the most promising rival to the Adobe ecosystem I’ve seen on the Windows Desktop.
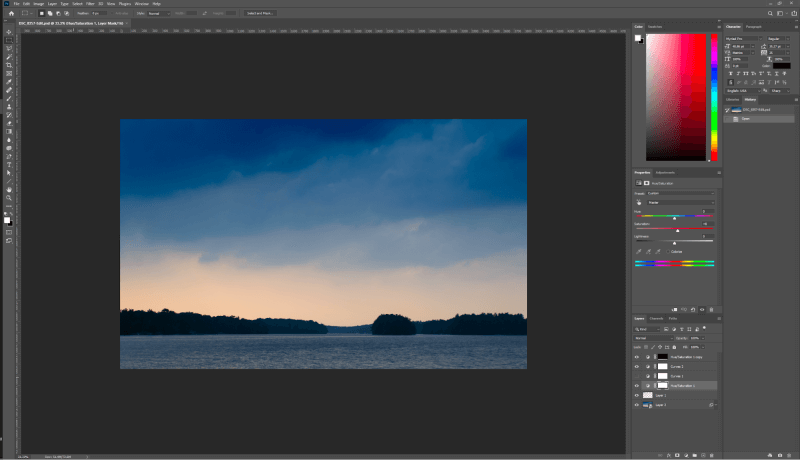
The only true option for those of you who require the best editor currently available is Adobe Photoshop CC. One of the first picture editors still in use today, Photoshop benefits from years of improvement. It is designed to handle large files with numerous intricate adjustments. And includes sophisticated editing capabilities integrated into an interface that is entirely customizable.
For beginners, Photoshop can be a little confusing. But there are several tutorials available to help you get up to speed right away. Although some users object to the fact that Photoshop can only be accessed via an Adobe Creative Cloud subscription plan. Given how frequently updates occur, it’s still more affordable than the previous method of purchasing perpetual license copies on a regular basis.
Naturally, you might disagree with some of my top choices. Beyond my top three photo editors, we’ve provided information about a broad variety of programs; therefore, one of them may be better appropriate for your taste. We’ve also provided a few possibilities for those on a tight budget at the conclusion of the article. If you’re searching for something free or open source, but struggle to stay up with a dedicated development staff.
1. Adobe Photoshop Elements is Best for Beginners
As you might have guessed from the name. Photoshop Elements is just as powerful as the full version of Photoshop. And cuts it down to the most common editing tools. It’s made for regular home users, but it’s powerful enough to do all the most common photo editing tasks. It’s not meant to edit RAW photos, but it can because it uses the same Adobe Camera Raw (ACR) engine as all Adobe apps.
Also, Read- Now Buy Any of These Foot Massagers to Relax your Feet and Keep it Hygienic.
For people who have never edited photos before, Guided mode has step-by-step wizards for a wide range of tasks. Such as cropping a photo, making it black and white, or making a photo collage.
Once you know how to use your photos. You can switch to Quick mode, which skips the guided steps in favour of a direct toolkit. Still, you can always change between modes. You can switch to Expert mode if you want even more control. This adds to the tools you can use in Quick mode and gives you access to layer-based editing, which makes it easy to make changes in specific places.
The interface of Photoshop Elements is fairly straightforward and user-friendly. There are big design elements as well as practical advice. Instead of the more contemporary dark grey of other Adobe programmes, it still has the rather unpleasant light grey colour of the early 2000s. But, that does not imply that it is useless. If you don’t like the default layout, you can modify portions of it in Expert mode, but there aren’t many options.
Adobe has made a “Home” screen where new tutorials, ideas, and inspiration can be found. It gets new content from Adobe pretty often, and editing new projects in it is a great way to improve your editing skills without having to leave the program. I can’t help but think that the “live” section in older versions was a better way to handle this, but Adobe has tried to put a lot of its tutorial content on its website.
2. Zoner Photo Studio X is the best middle ground.
Zoner Photo Studio has been in the works for a long time, but it hasn’t gotten the attention it deserves. It is a very powerful mix of a catalogue manager like Lightroom and precise editing like Photoshop, and the developer is always adding new features and fixing bugs.
Anyone who has used a modern photo editor before will find the interface clean and easy to use. There are also a lot of tutorials and knowledgebase articles online to help new users learn the basics. You can open multiple Library, Develop, and Editor windows at once with a tab system like the one in your web browser. This is a big productivity boost over just having multiple files open.
In both non-destructive and layer-based editing modes, the editing tools are powerful and easy to use. Pixel-based edits don’t give you quite as much freedom as Photoshop, but ZPS should be able to handle all but the hardest reconstructions.
This doesn’t mean, of course, that Zoner Photo Studio is perfect in every way. The default design of the interface is pretty good, but I’d like to be able to change it more to fit my workflow (and maybe hide the “Create” module, which I probably won’t use).
It could use some work on how it handles camera and lens profiles for automatic correction, and you may want to double-check that there are profiles for your camera and lens combination.
ZPS does say here that they use such a clumsy way of implementing profiles on purpose so they don’t have to pay Adobe licensing fees. This should be funny to anyone looking for an alternative to the Creative Cloud ecosystem. But since it’s already so cheap, I wouldn’t mind paying a little more for a better user experience.
3. Adobe Photoshop CC is the best for professionals.
Adobe Photoshop CC is the best photo editor on the market right now for anyone who wants to edit photos professionally. After 30 years of development, it has the best set of features of any image editor. And is used by almost everyone in the graphic arts industry as the standard editor.
Because it has so many features, it can be hard for casual users to figure out how to use it, even though there are a lot of tutorials available from a wide range of sources. Not everyone who wants to edit needs Photoshop.
Photoshop can do almost everything when it comes to general image editing. It has the best layer-based editing system, the most options for making changes, and some really cool tools. You can use the same tools to do simple photo editing or make complicated photo-realistic art.
When you open a RAW photo to edit it, it will first open in the Adobe Camera RAW window. This lets you make non-destructive changes to the whole image as well as a few limited changes to specific parts of it. The changes are then made to a copy of the image that has been opened as a Photoshop document. From there, you can make local changes or more complex changes like focus stacking, HDR tone mapping, and other major changes to the image’s structure.
Almost everything about the user interface can be changed, including the colour of the background and the size of the interface elements. You can use one of Adobe’s “workspaces,” which are pre-made layouts, or you can make your own workspace that fits your needs.


